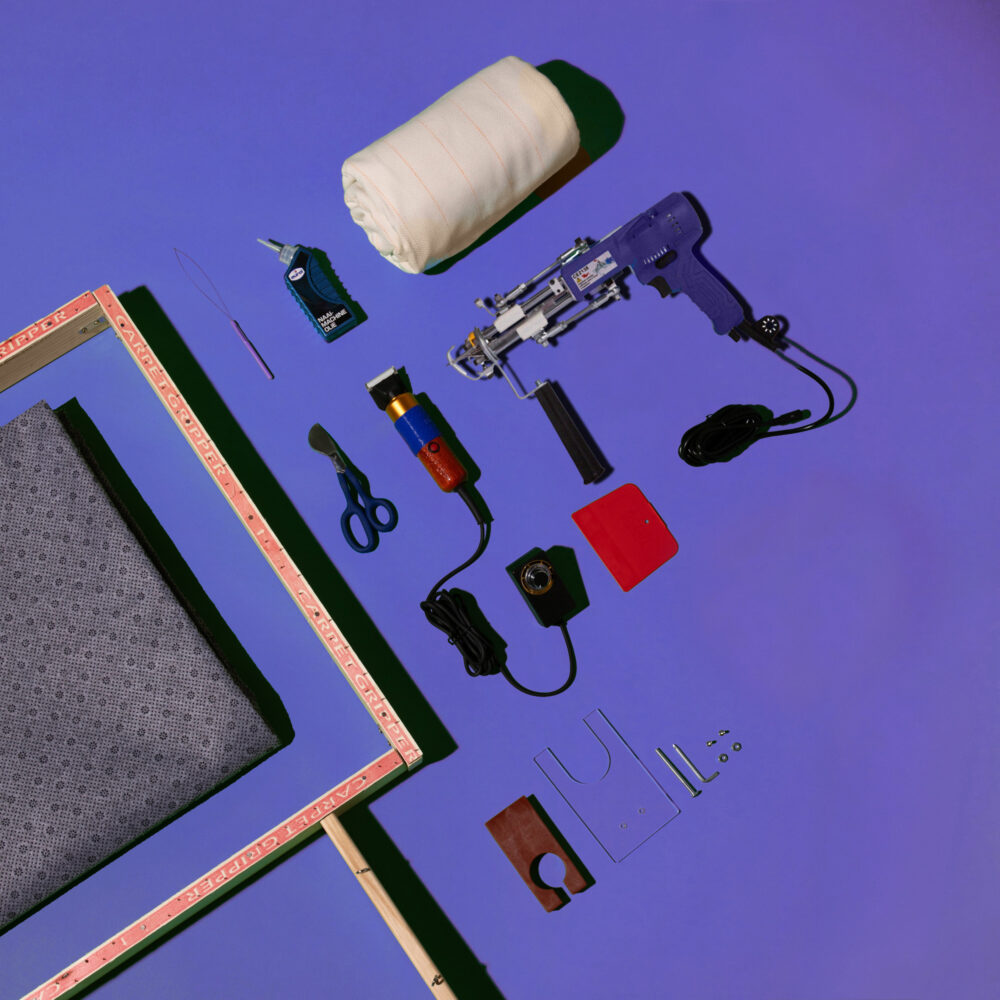
The AK-1N Duo lets you customize the pile height of your tufted rugs, from 8mm to 16mm. To adjust the pile height, you’ll need to change the positions of a few parts. This guide walks you through it step by step.
Note: Adjusting the pile height requires precision. We recommend familiarizing yourself with the mechanics of your tufting machine before making adjustments, as improper changes may affect functionality. So study the movements, get familiar, and take some notes on your stock settings so you can go back to normal easily!
Use this table to find the right measurements for your desired pile height:
| Gear hole | Scissor to Needle hole | Scissor to Pusher |
|---|---|---|
| 8mm | 16mm | 9mm |
| 9mm | 17mm | 10mm |
| 10mm | 17mm | 11mm |
| 11mm | 18mm | 12mm |
| 12mm | 19mm | 12mm |
| 13mm | 20mm | 14mm |
| 14mm | 21mm | 15mm |
| 15mm | 22mm | 19mm |
| 16mm | 25mm | 20mm |
Step-by-Step Instructions: #
Safety first. Always unplug the AK-Duo before making any adjustments.
1. Set the pile height on the gearwheel #
Turn the machine upside down so you can see the gearwheel. Each hole is marked with a pile-height number in millimetres. Choose the hole that matches your target height, insert the rod, and tighten it firmly.
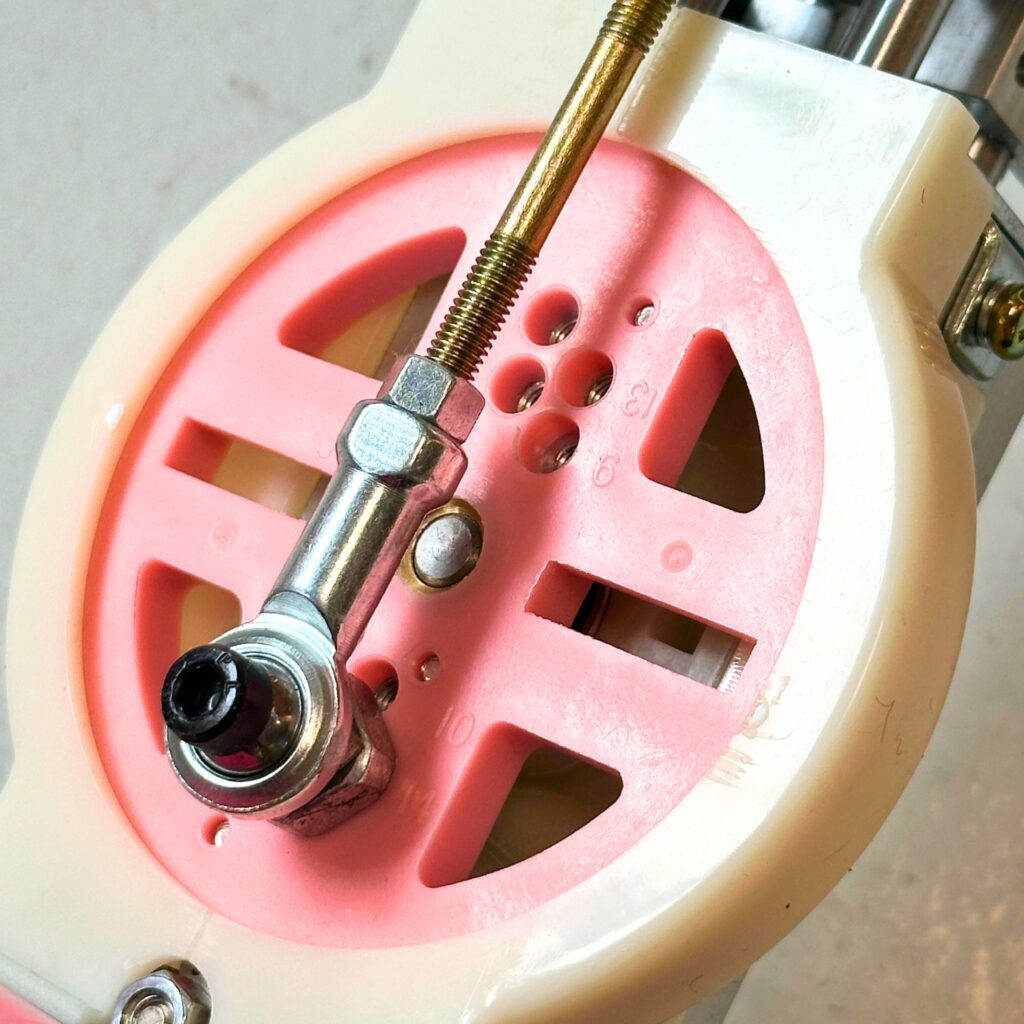
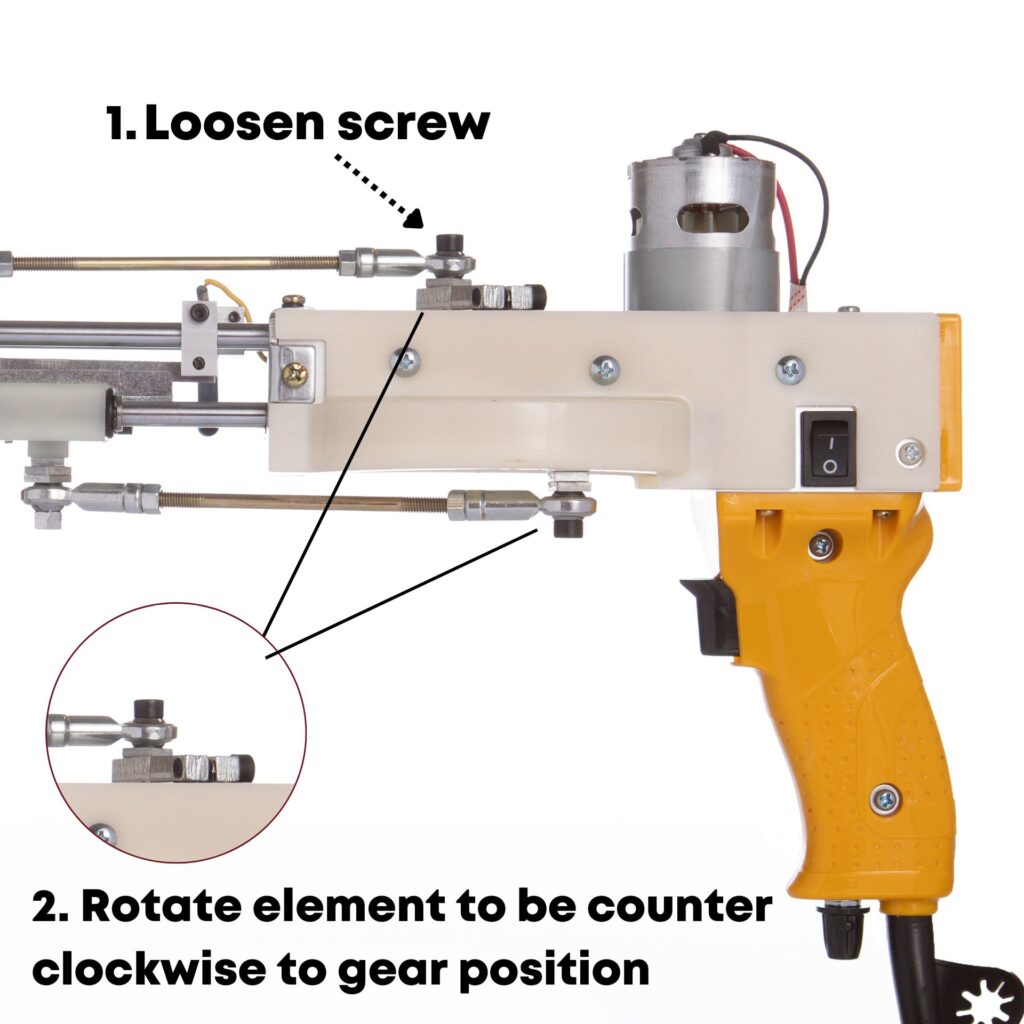
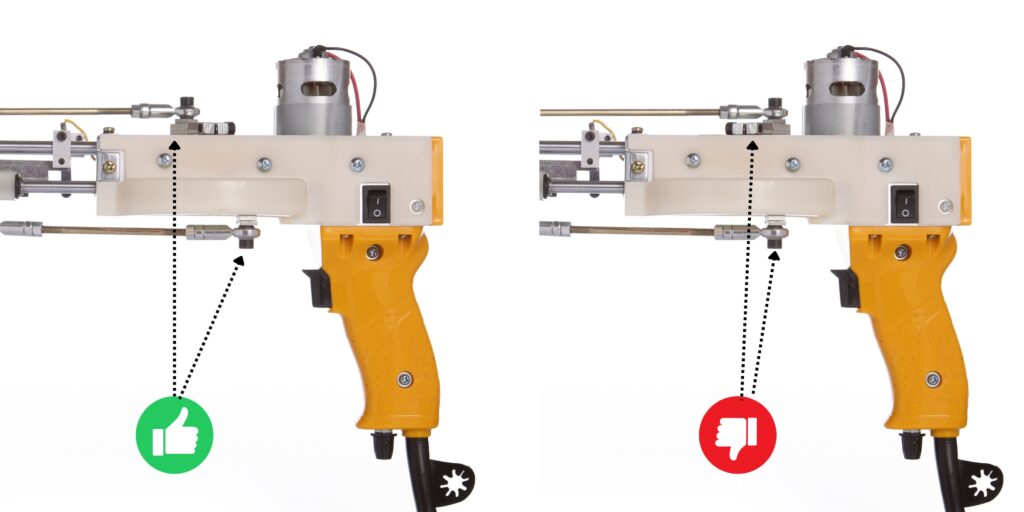
Important: If you switch to a hole on the opposite side of the gear, reposition the top rod so it remains counter-clockwise to the gearwheel.
2. Adjust the scissor-to-needle distance #
Rotate the gearwheel until the scissors are fully retracted back into the machine, the “6 o’clock” position for the gearwheel. Then measure from the mouth of the scissors to the edge of the needle hole: this is the scissor-to-needle distance.
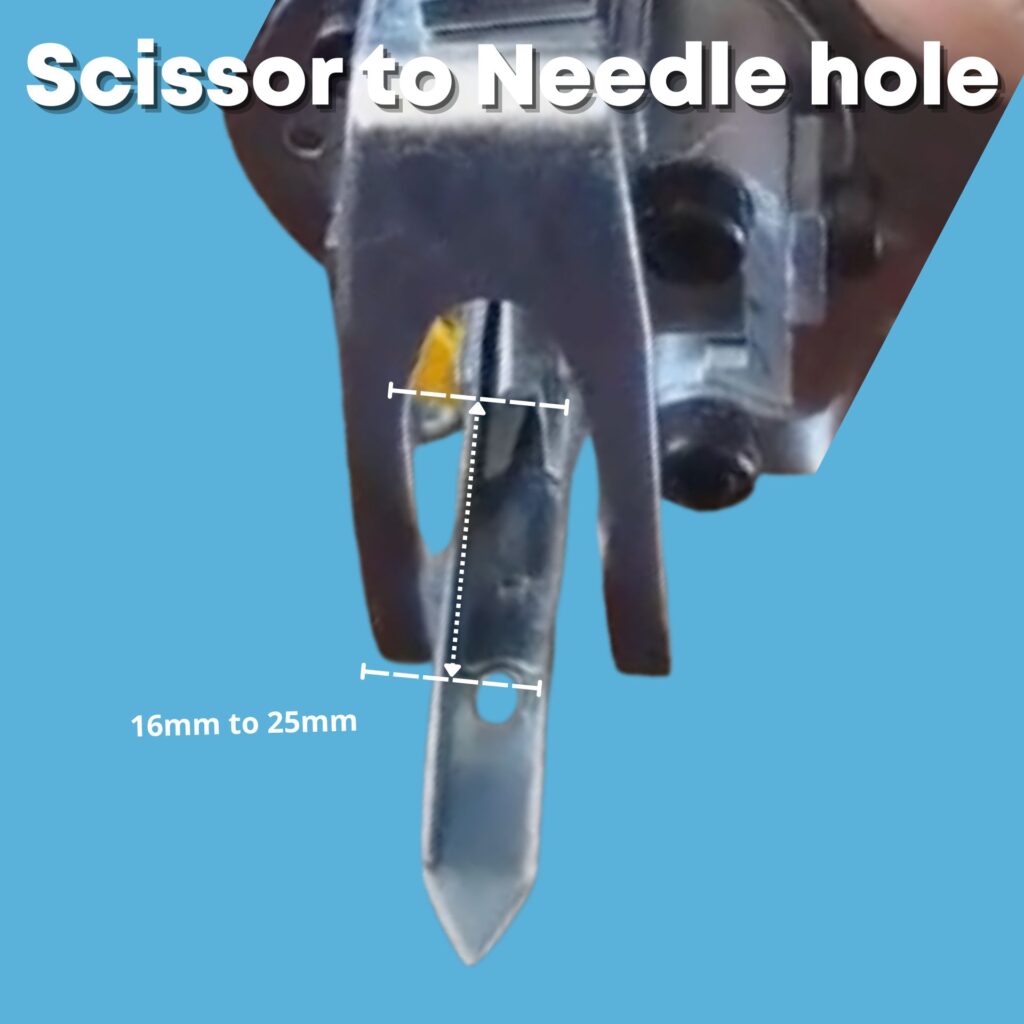
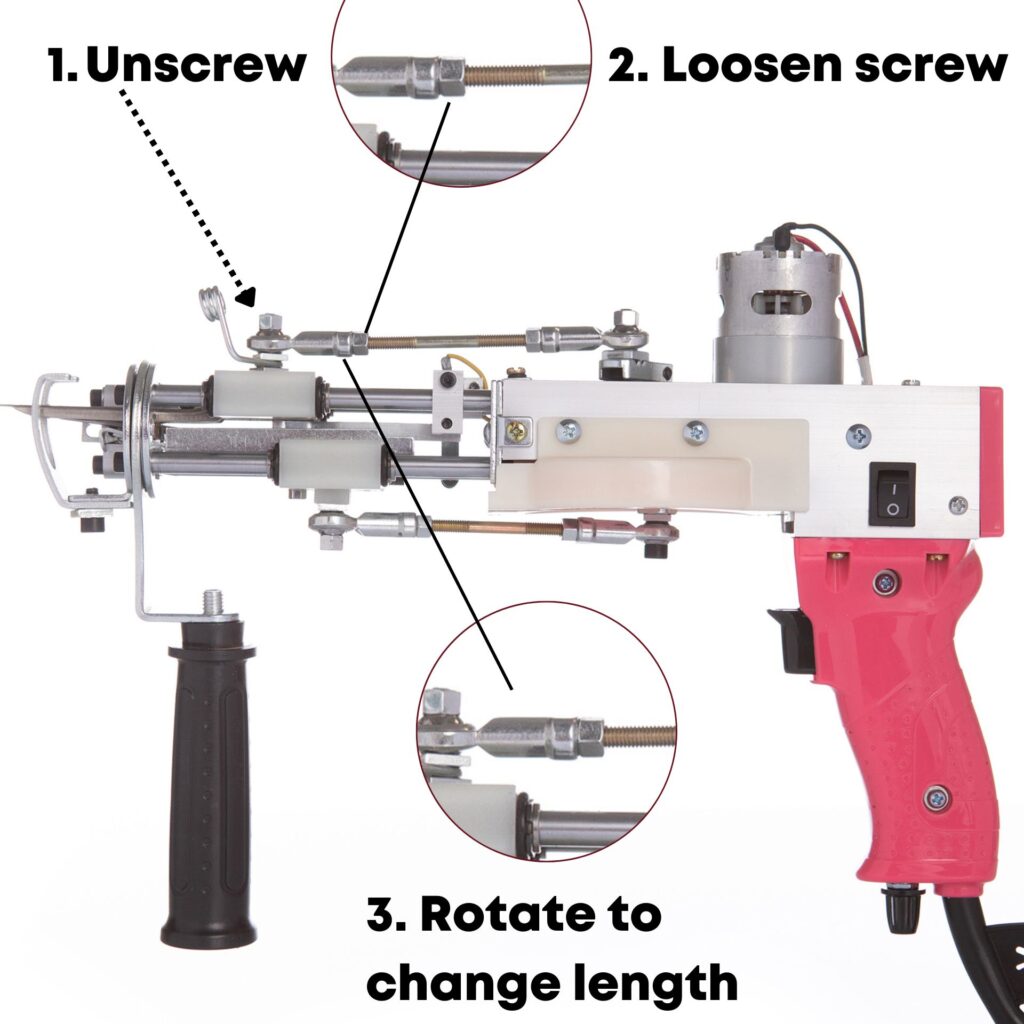
To change the distance, loosen the screw on the upper bearing rod and remove the rod. Turn the threaded adjustment rod.
- Clockwise = larger distance (higher pile)
- Counter-clockwise = smaller distance (lower pile)
Re-attach the bearing rod and tighten the screw when you reach the desired length.
3. Adjust the pusher-to-scissor distance #
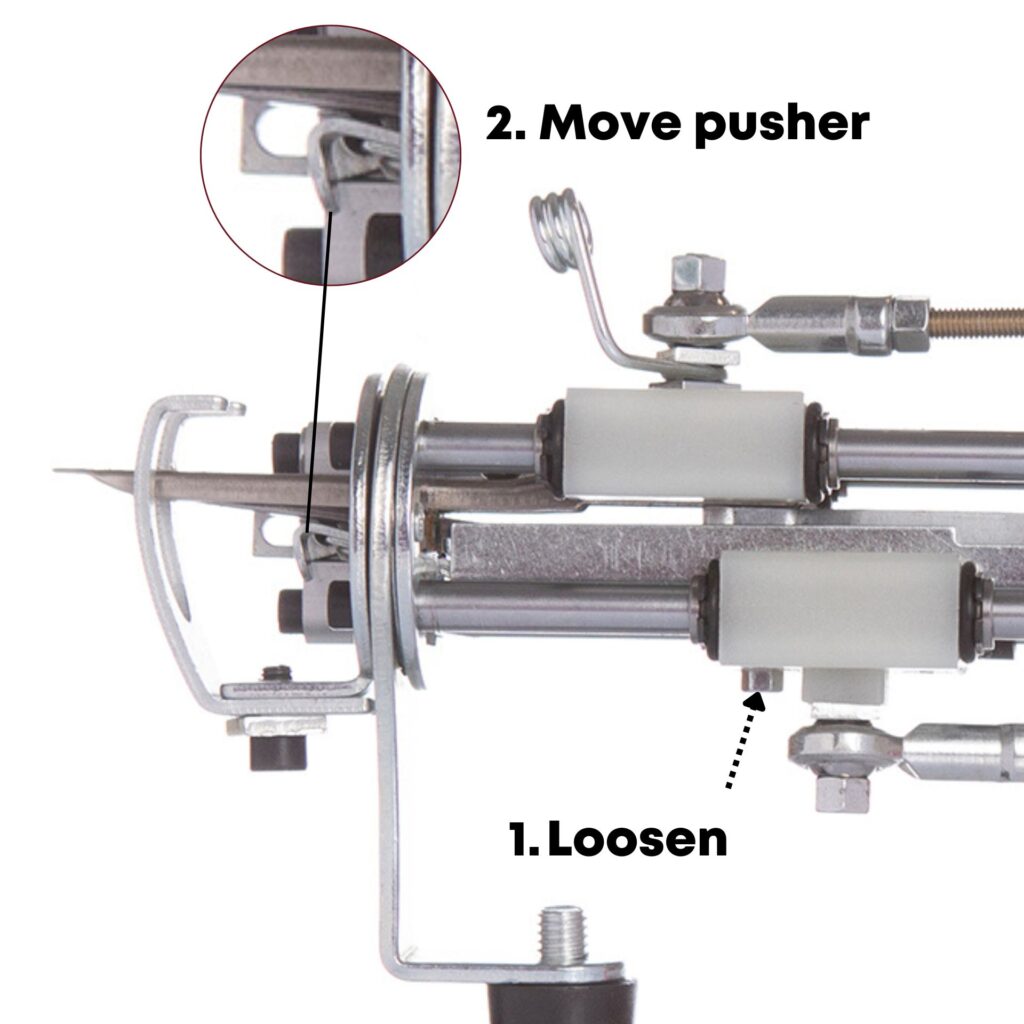
The pusher is the small metal plate just below the scissors that stops them from penetrating too far into the tufting cloth.
Rotate the gearwheel to the “12 o’clock” position so the scissors are fully extended.
Measure the gap between the pusher and the start of the scissor mouth, then set it to the value given in your settings table.
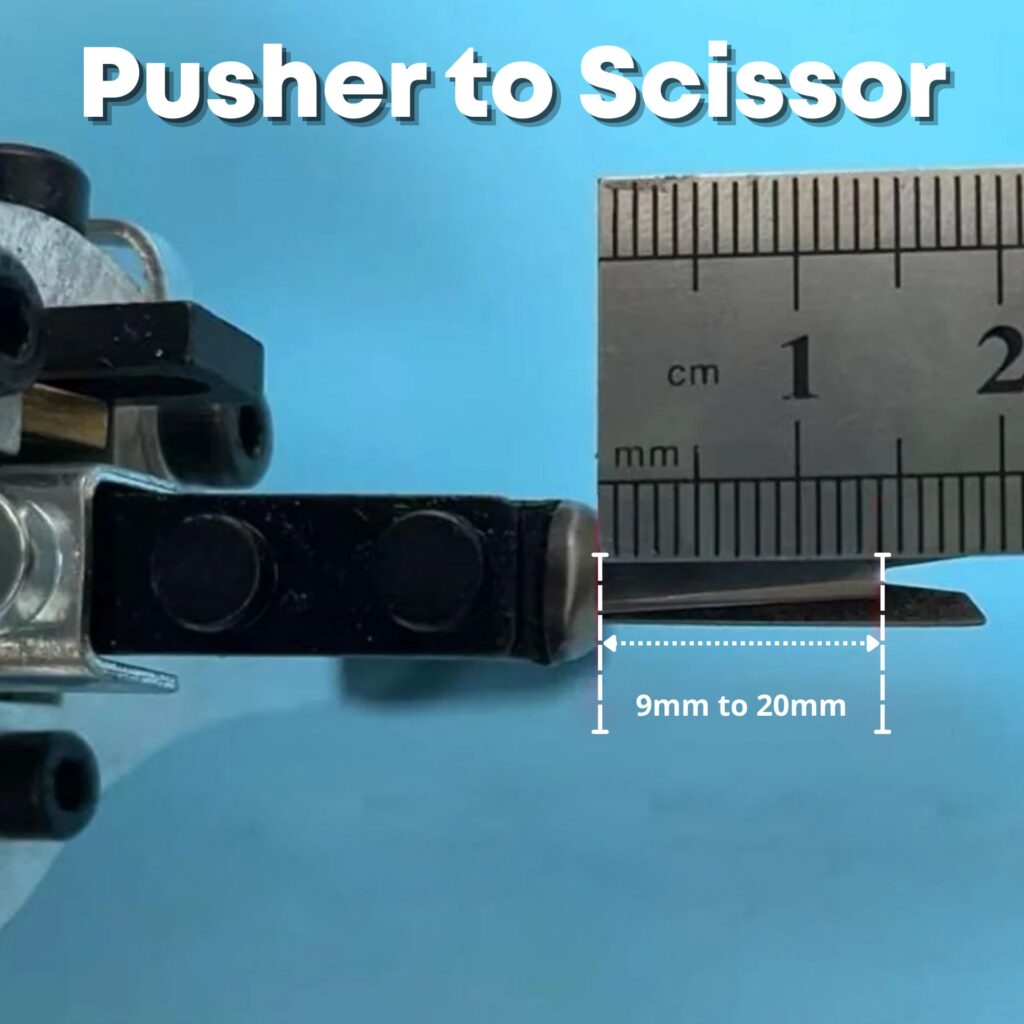
To move the pusher back or forward, slightly loosen the screw on the bottom of the white slider block, slide the pusher forward or back, and retighten.
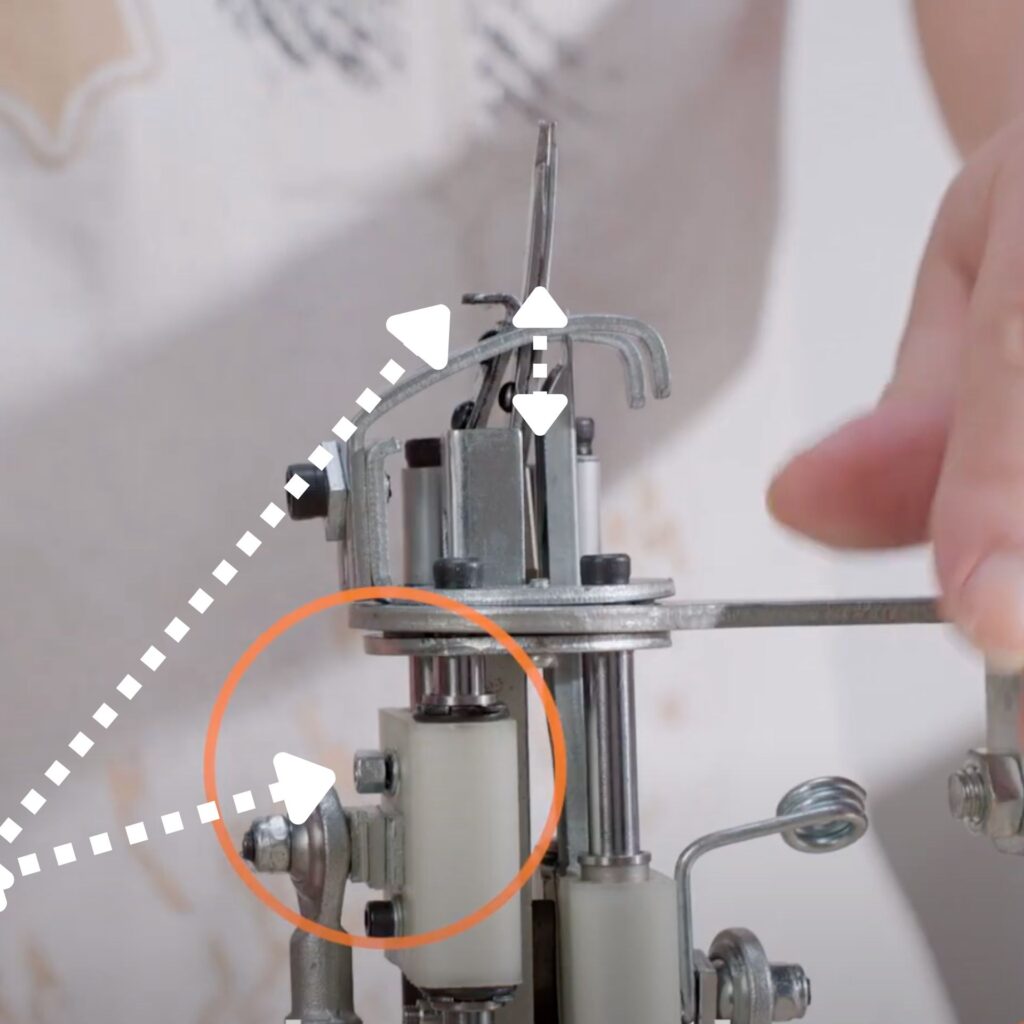
4. Check the fabric presser #
The fabric presser sits on either side of the needle. Its gap to the needle hole should always be 3–4 mm, no matter which pile height you choose.
With the scissors retracted (the gearwheel at 6 o’clock), confirm the 3–4 mm gap between presser and needle hole.
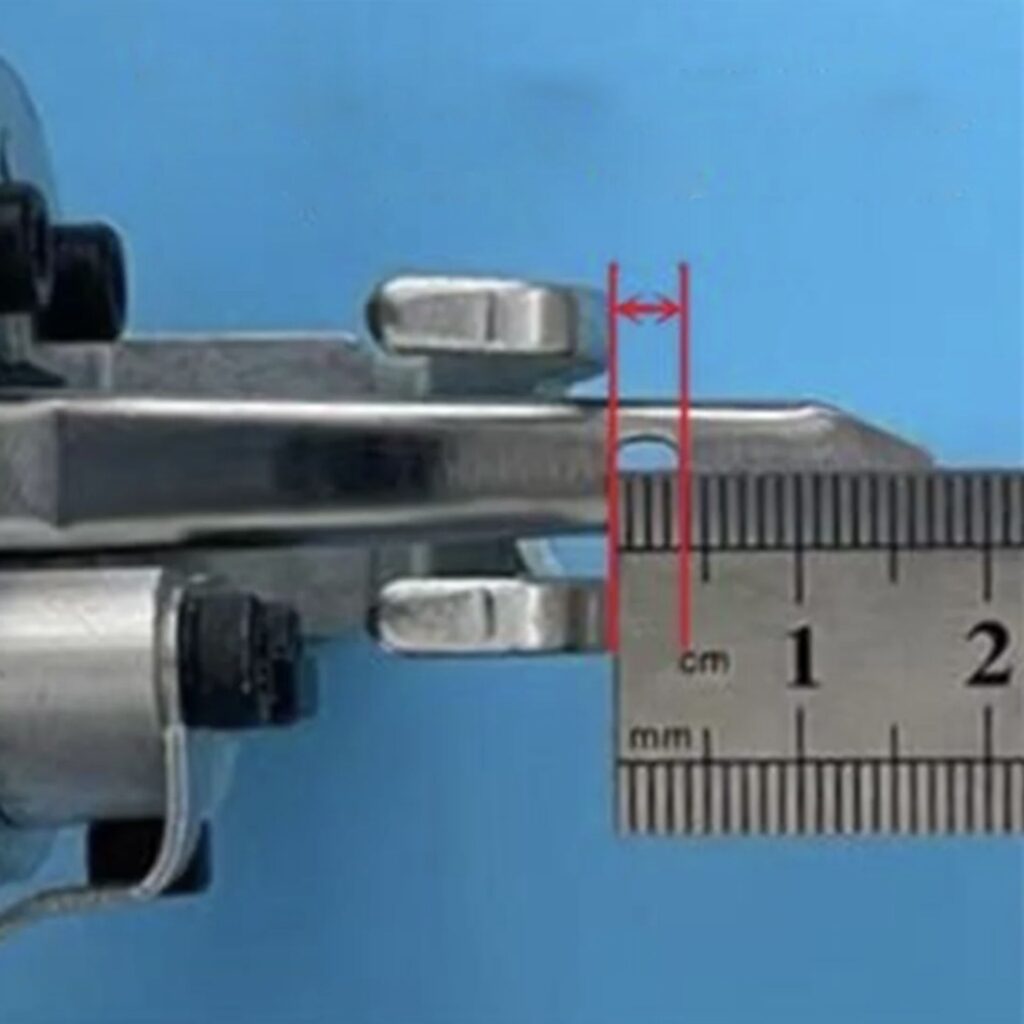
Next, rotate the gearwheel to “12 o’clock” so the scissors are fully forward. The needle tip must not stick out beyond the fabric presser at this point. If it does, loosen the presser’s screw, slide the presser forward or back until the needle sits just behind it, then tighten the screw.
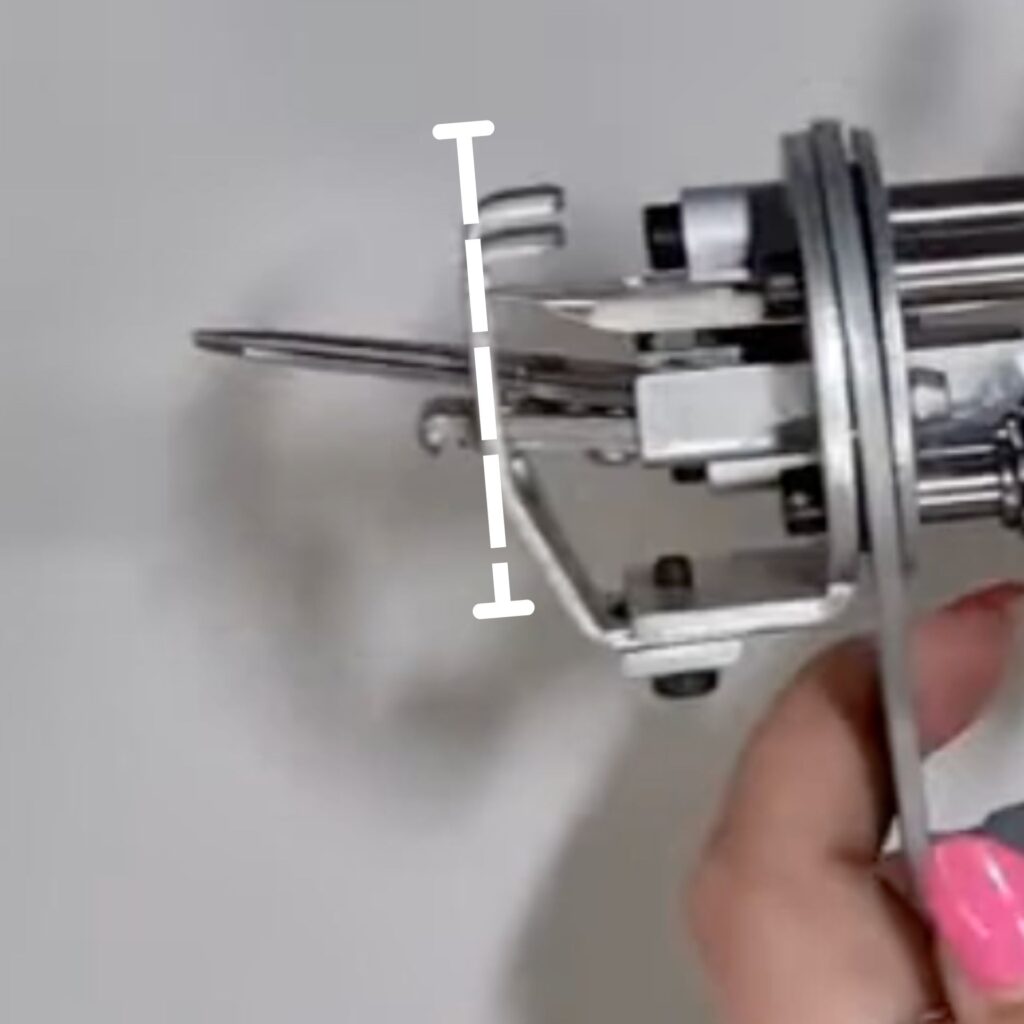
If the tip of the needle is sticking out beyond the fabric presser, move the fabric presser forward by slightly loosening the screw, and moving the presser forward or backward.
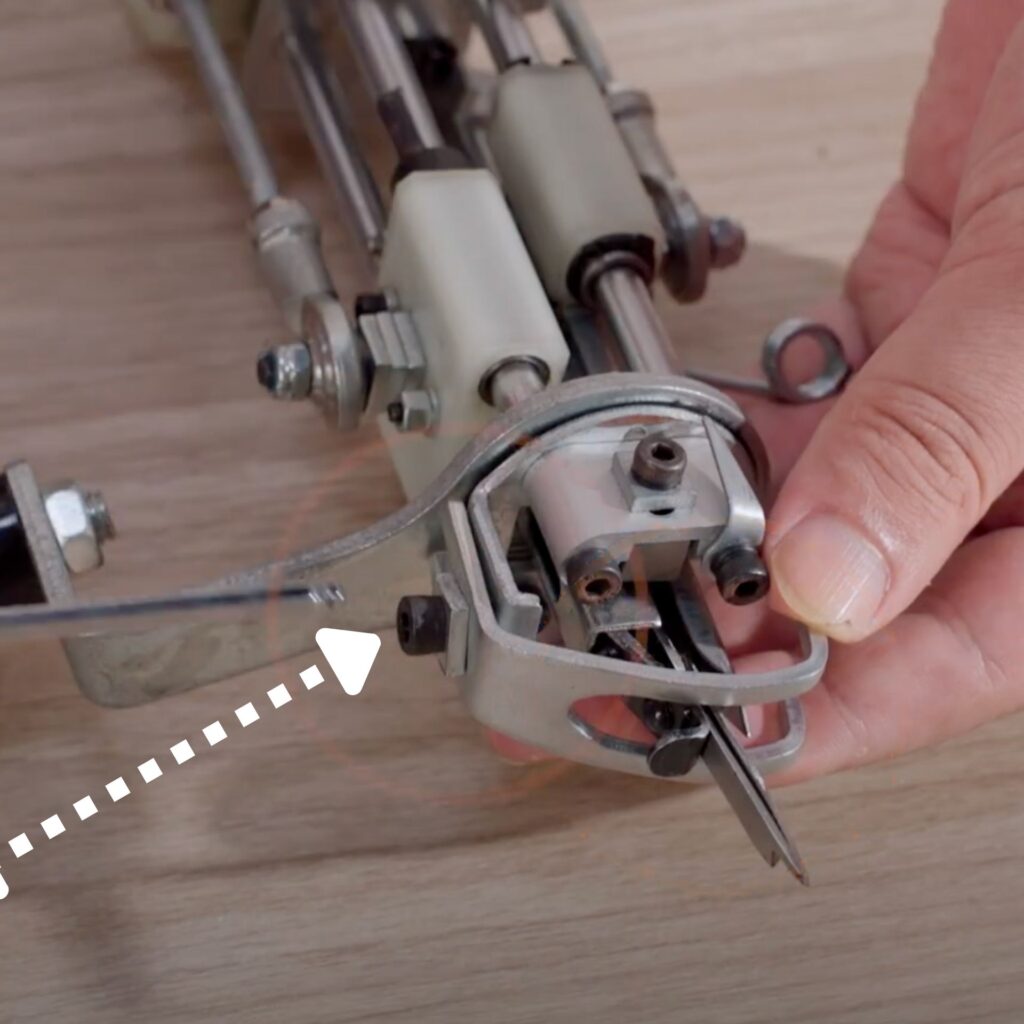
5. Test to see if the scissor opens and closes/cuts. #
Before plugging the machine back in, manually rotate the gearwheel through a full cycle. The scissors should open and close smoothly with no snagging. If anything feels off, see below.
You might need to adjust the scissor closer and opener elements so that the scissor hits them when retracting and moving outwards. Luckily we have a video showing this!
6. You should be done! #
You made it! Before starting your actual project, do a few test lines on a scrap piece of tufting cloth to ensure the pile height looks and feels right. Perhaps you need to adjust something a millimeter here or there.


